Tampilkan postingan dengan label Touch. Tampilkan semua postingan

Rabu, 04 Maret 2009

How to Tether Jailbreak Your iPod Touch 2G (Windows)

These are instructions on how to tether jailbreak your iPod Touch 2G using Windows and Voltage. This is a preliminary release of redsn0w from the iPhone Dev-Team. It is not supported in anyway and may void your warranty or brick your iPod.

After performing the jailbreak your iPod touch 2G will not be bootable without assistance from a tethered computer. Unless you really need a jailbreak we suggest waiting till the iPhone Dev-Team releases an untethered jailbreak.

Step One
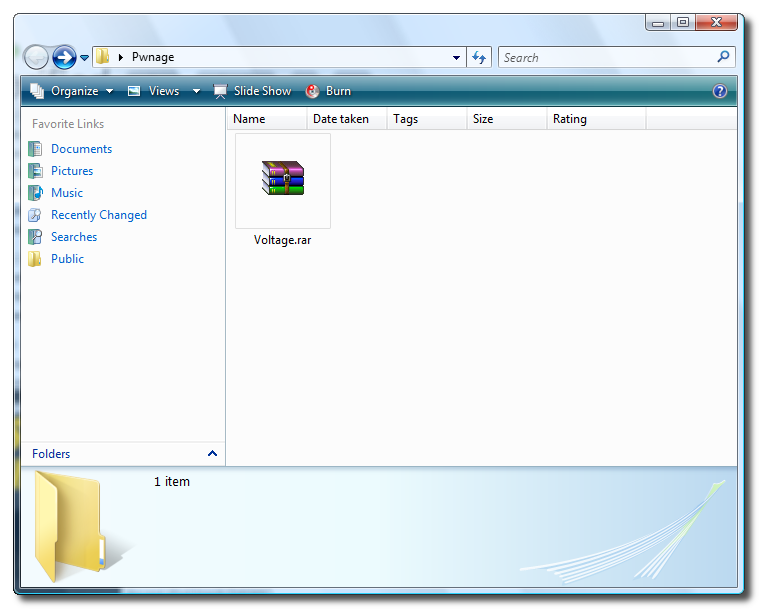
Create a folder called Pwnage on your desktop and download Voltage into that folder.
- Voltage

Step Two
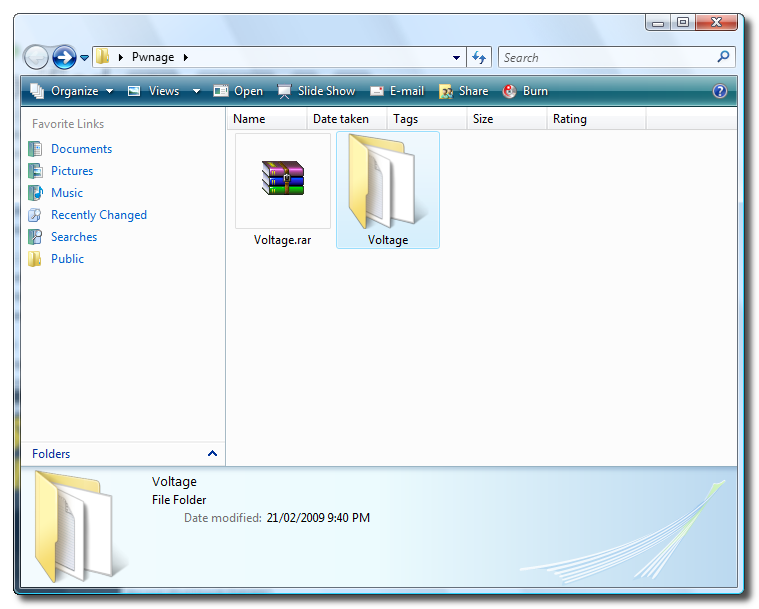
Double click the Voltage archive to extract it. Note*: You may need WinRar installed to do this.

Step Three
Double click the extracted Voltage folder and double click to launch Voltage - Jailbreaker.exe
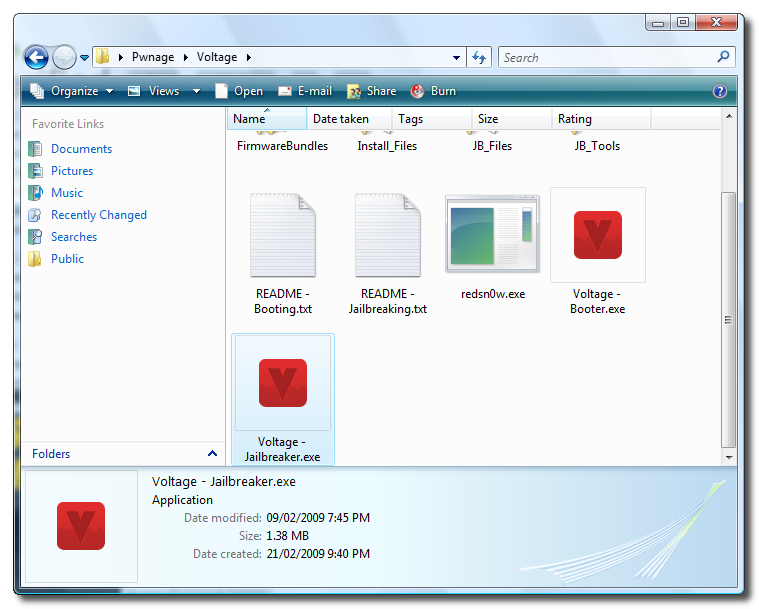

Step Four
Voltage will launch and present you with three requirements for jailbreaking.
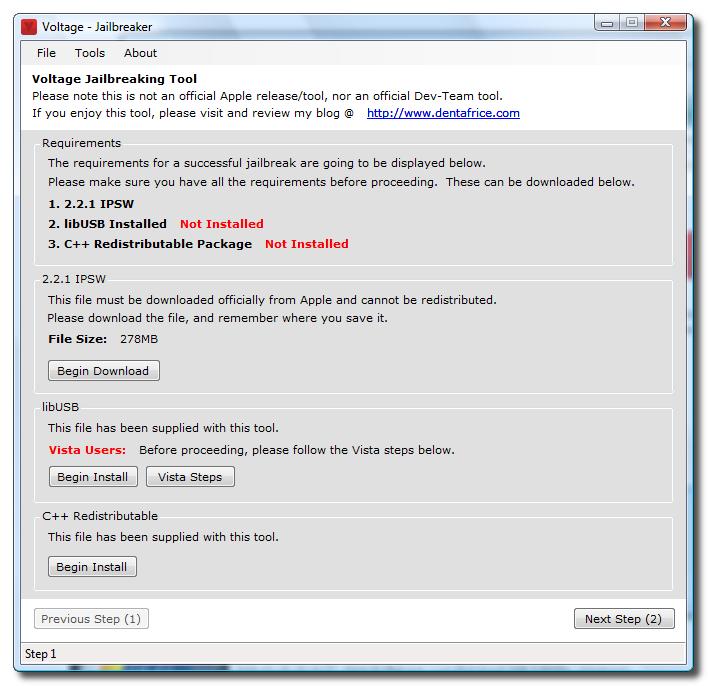

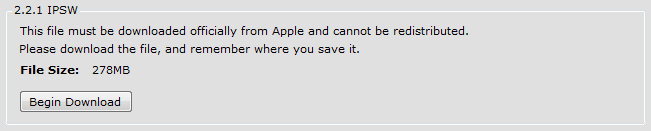
Click Begin Download to start downloading the iPod Touch firmware ipsw.

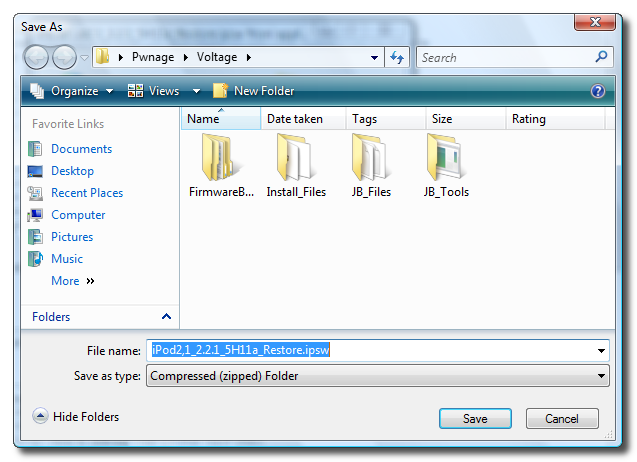
Click to Save to save the firmware file to your hard drive.
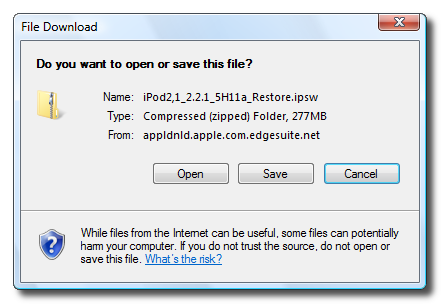

When asked where to save the file you can place it in the Voltage directory.

Step Five
If you are using Vista you must follow these steps to continue. If you are on Windows XP you can skip to Step Six.

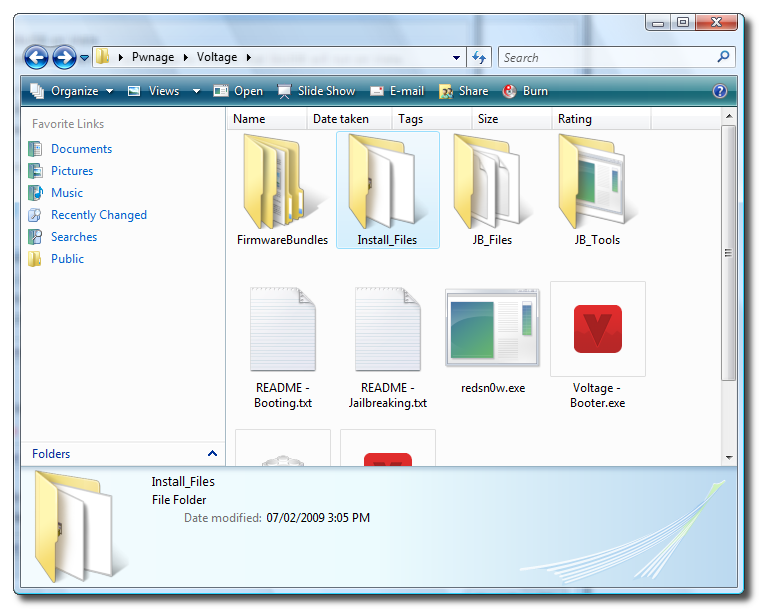
Double click to open the Install_Files folder from the Voltage folder you already have open.

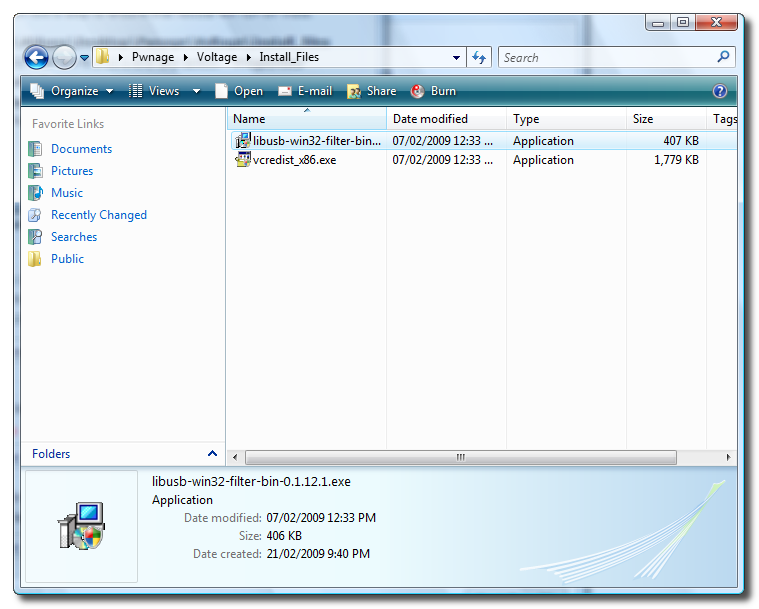
Right click the lib-win32-filter-bin-0.1.12.1.exe file and select Properties from the popup menu.
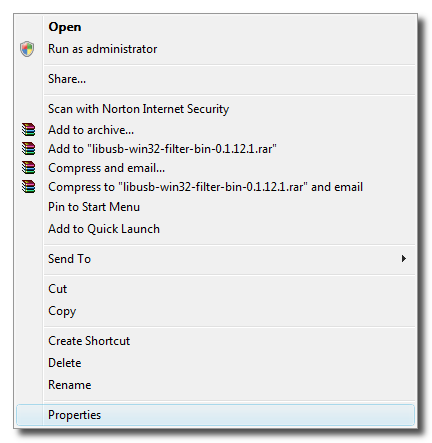


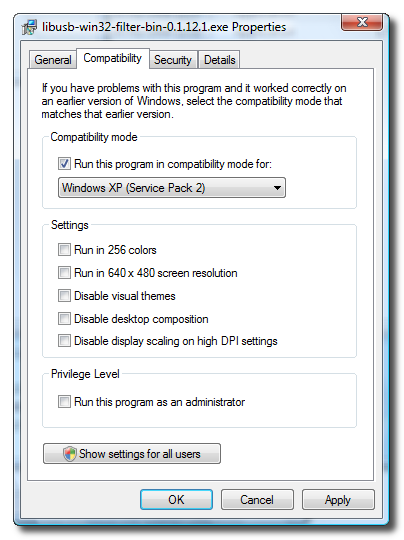
Click to select the Compatibility tab.
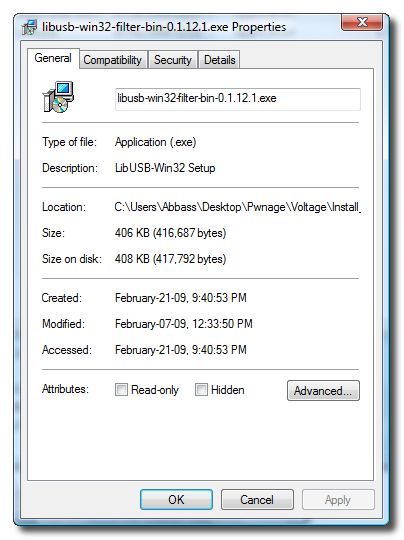

Check the Run this program in compatibility mode for: box. Make sure Windows XP (Service Pack 2) is selected from the dropdown then click the OK button.

Step Six
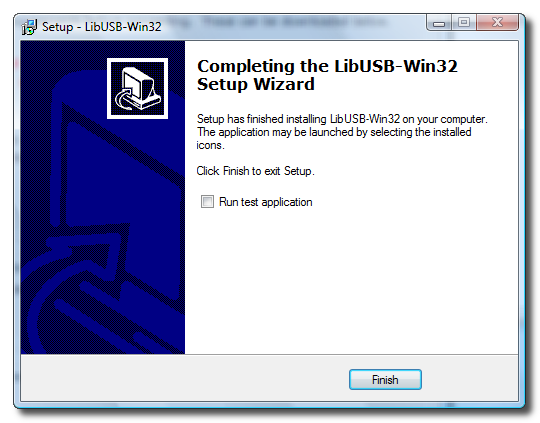
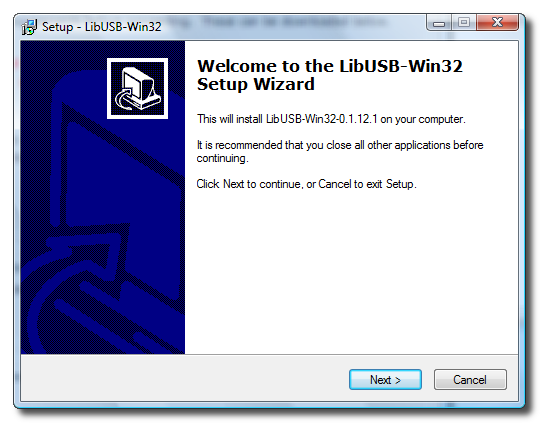
Click the Begin Install button to launch the LibUSB installer.


Follow the prompts to install LibUSB on your computer.


Step Seven
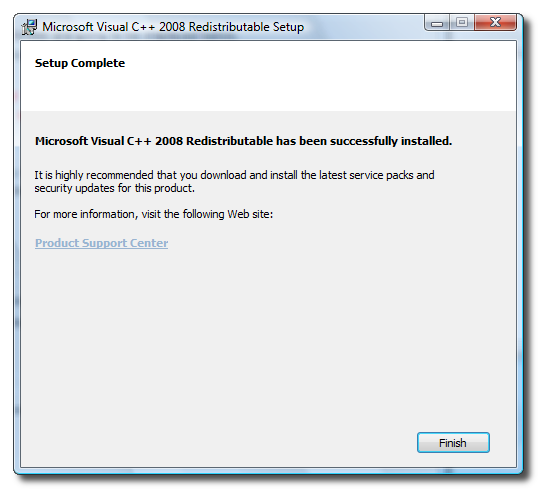
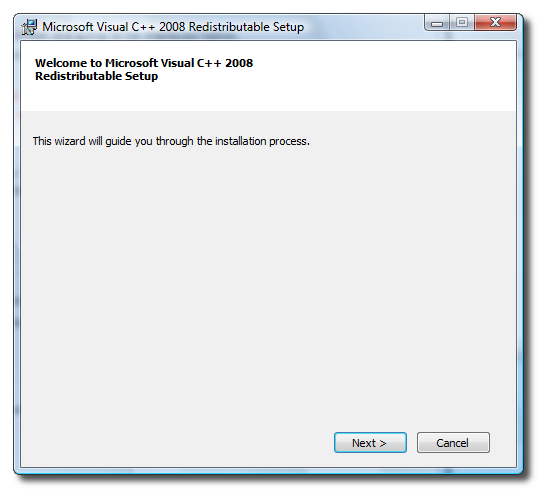
Click the Begin Install button to launch the C++ Installer.


Follow the prompts to complete the C++ installation on your computer.


Once the installation has completed click the Next Step button at the bottom right of the Voltage screen.

Step Eight
Click the Select button to select the IPSW file you downloaded.
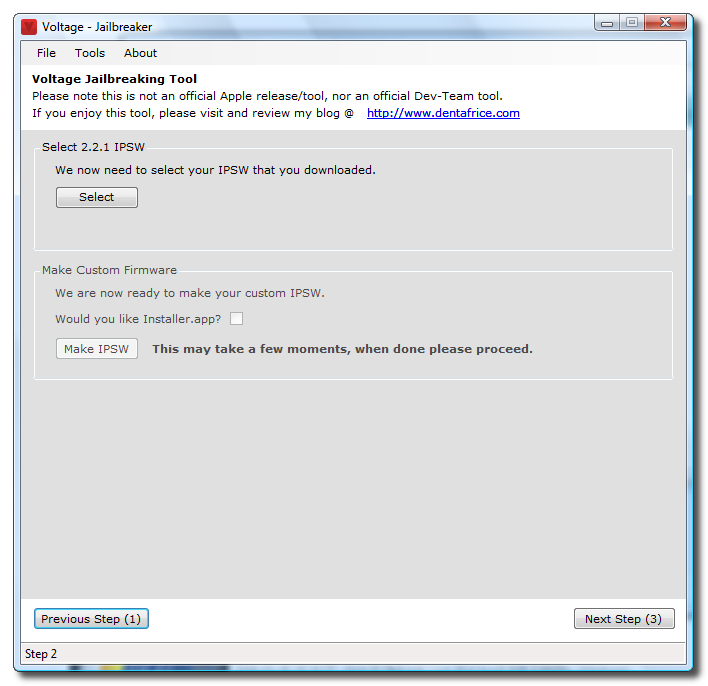

Navigate to the Voltage folder and select the iPod touch 2.2.1 firmware file then click the Open button.
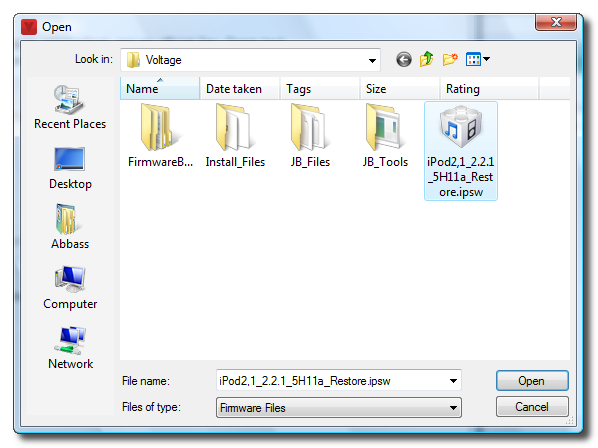

Step Nine
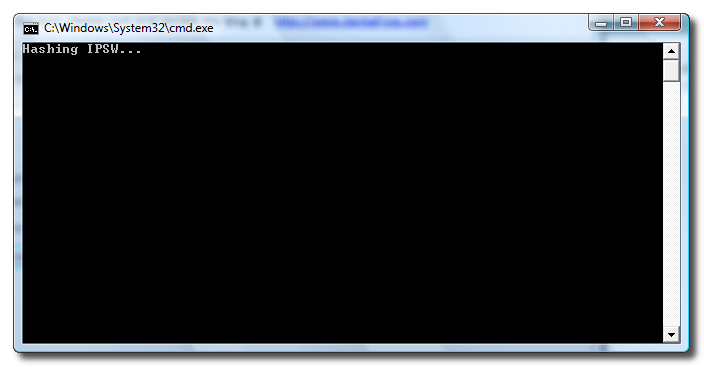
Now we will make a custom firmware ipsw. Click the Make IPSW file to continue.


A command prompt window will open to display the progress. It will close when the custom firmware ipsw is built.

Click the Next Step button to continue.

Step Ten
Now we need to put the iPod touch into DFU mode. The easiest way to do this is to plug the iPod into the computer then hold both buttons down for 10 seconds. Release the power button and continue holding the Home button for another 10 seconds.
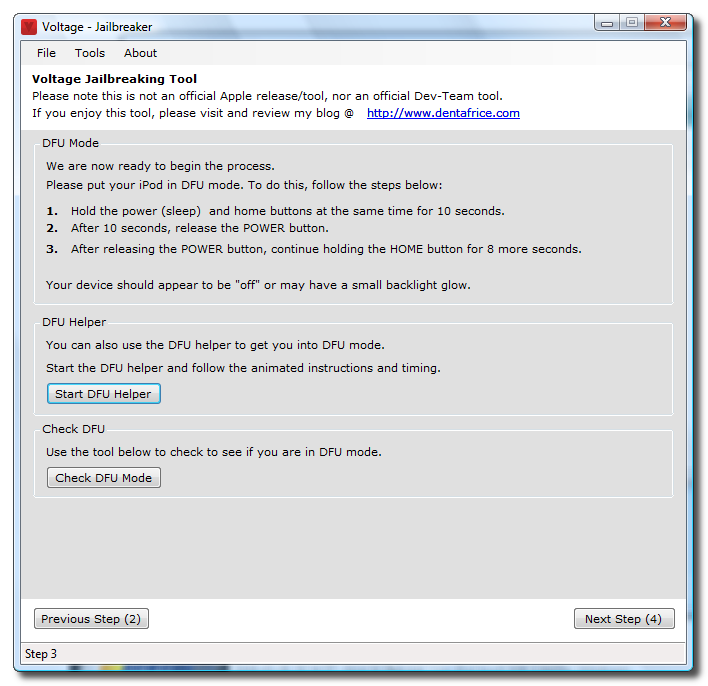

To confirm the iPod is in DFU mode click the Check DFU Mode button.
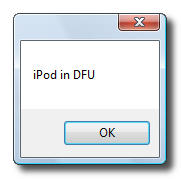

Once in DFU mode click the Next Step button to continue.

Step Eleven
You will now be able to patch the device. Click the Patch Device button.
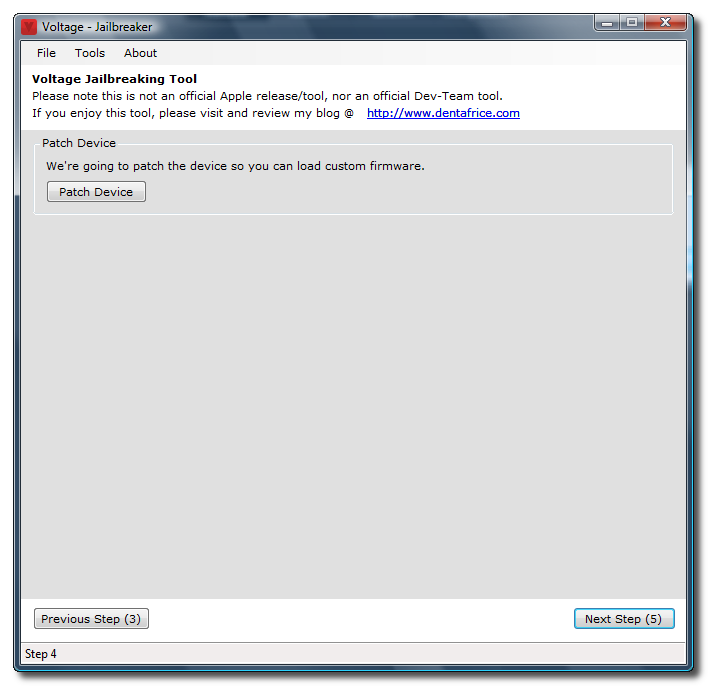

Step Twelve
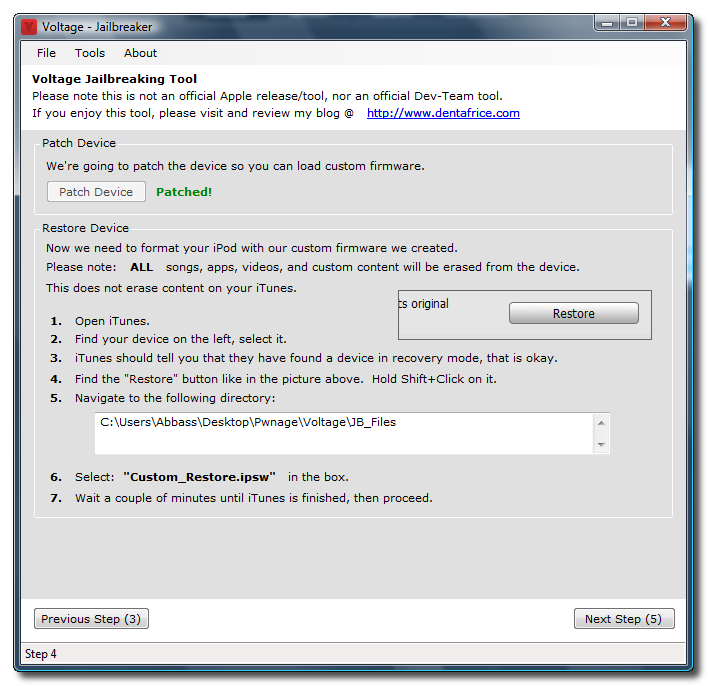
Once the device has been patched it is time to restore to your custom firmware using iTunes.

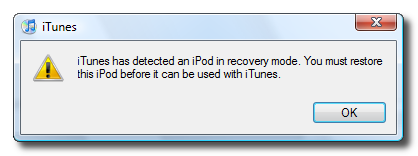
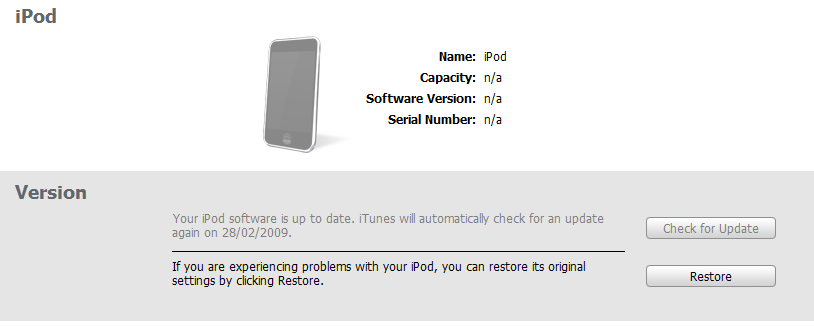
iTunes will have detected an iPod in recovery mode. Click OK to close the dialog box.

Hold down the Shift key and click the Restore button.

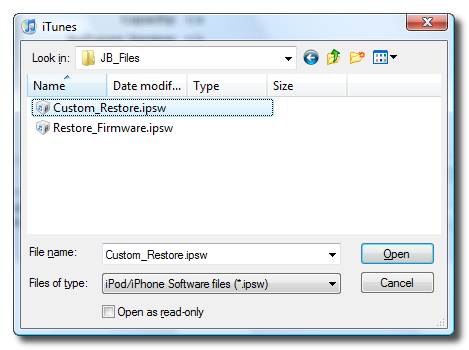
A popup window will open asking you to locate the firmware to restore to. Select the Custom_Restore.ipsw file from the Voltage/JB_Files folder then click the Open button.

Step Thirteen
Once the firmware has been restored successfully go back to Voltage and click the Next Step button.


You will need to place the iPhone into DFU mode again. The easiest way to do this is to plug the iPod into the computer then hold both buttons down for 10 seconds. Release the power button and continue holding the Home button for another 10 seconds.
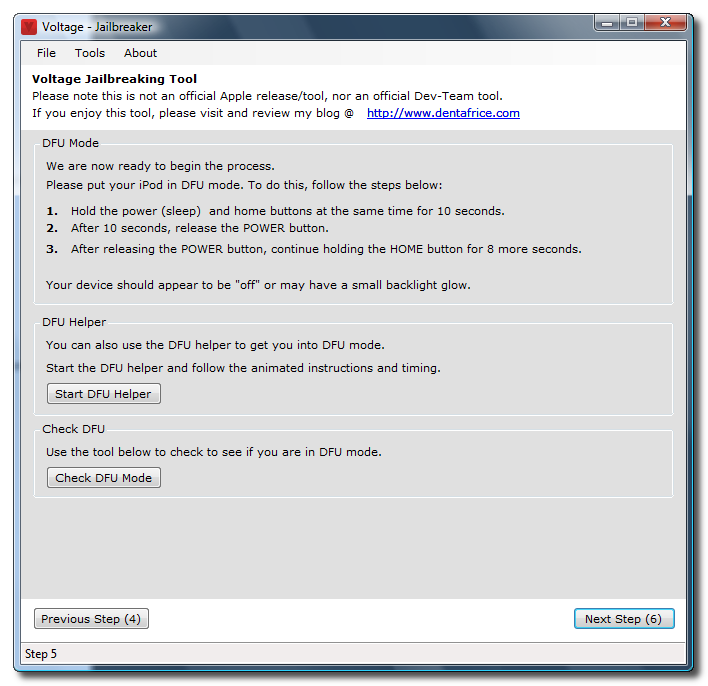

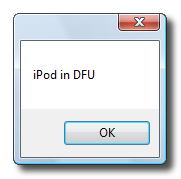
To confirm the iPod is in DFU mode click the Check DFU Mode button.

Click the Next Step button to continue.

Step Fourteen
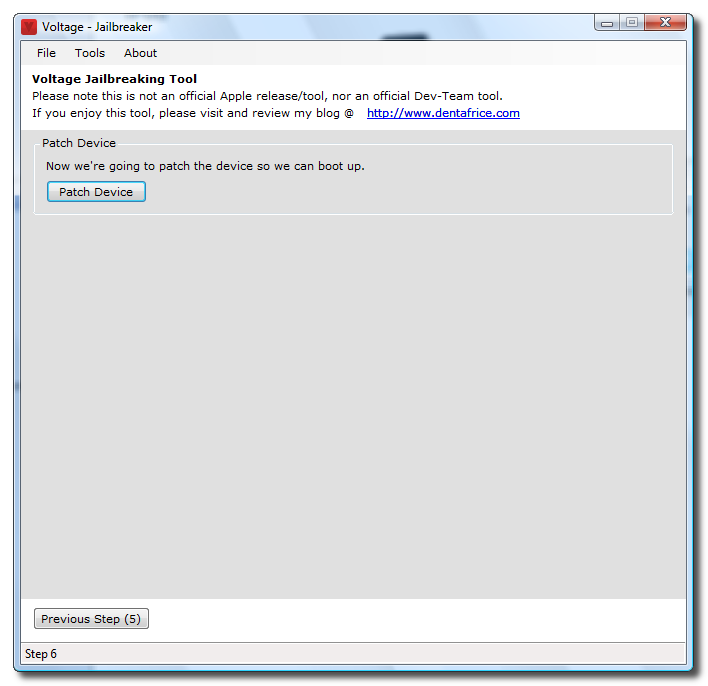
We will need to patch the device again so that it will boot up. Click the Patch Device button.

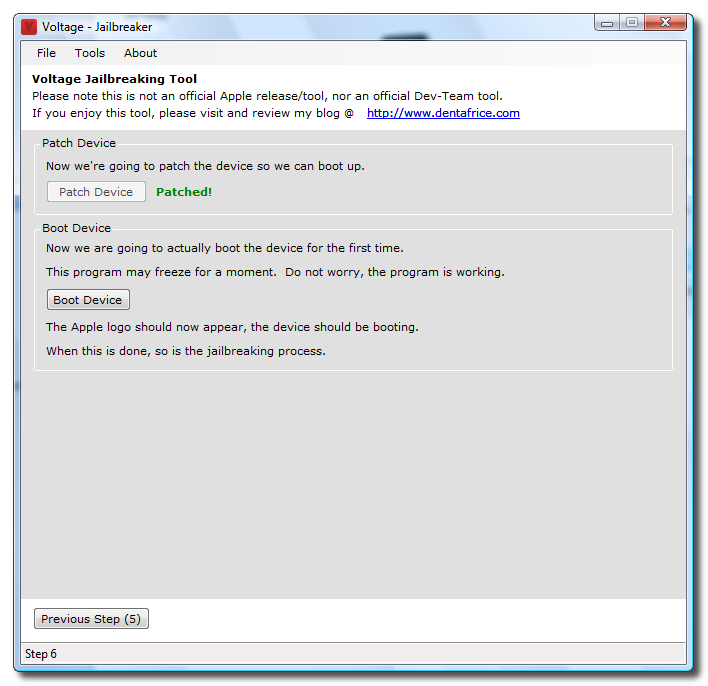
Now to actually boot the device click the Boot Device button.

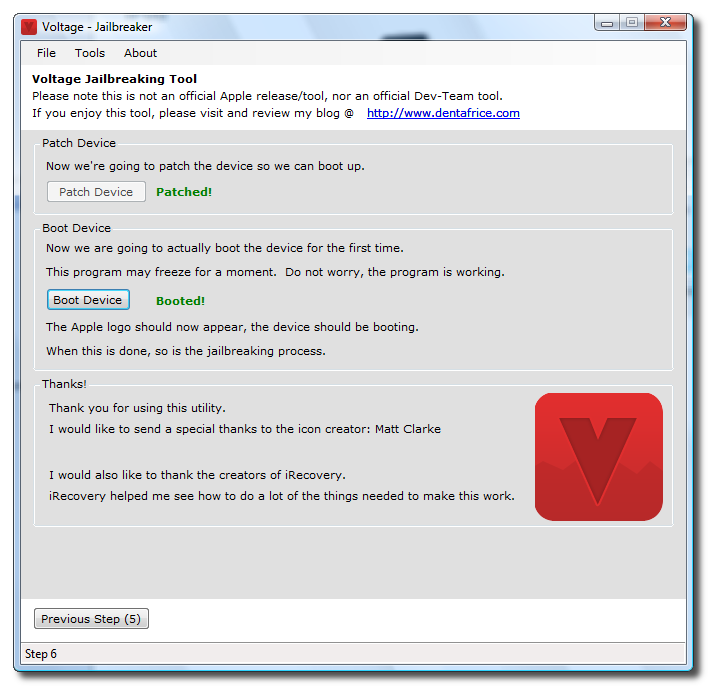
The iPod touch will now boot and you will see Cydia and Installer on your SpringBoard.


FUTURE BOOTS
If your iPod gets powered off in the future you can use the Voltage - Booter.exe program to reboot the device. There is a semi-tethered solution to jailbreaking which if your iPod gets powered off will reboot it in unjailbroken mode. We will be posting a tutorial on how to do this shortly.

THANKS
A big thanks go to CalebMingle for creating Voltage.

Installous unable to decompress archive

According to several comments (Also wide range of Google searches!) I think iPhone users have problems with the new version of Installous (1.2, 1.2.1, 1.2.2)! (I try to find some way to Downgrade it to the 1.1 but i can’t find any way yet!)

Reported issues:

  • Unable to decompress archive! (Main Problem)
  • Permission errors
  • iTunes removes installed apps
  • [Updated] “1 broken packages” the following packages have unmet dependencies: Installous
  • …

Solutions: (Exact solution not available yet)

If any of these solutions works for you (or if you have better solutions) please leave comment here and describe your experiences!

Version 1.2 (Also 1.2.2) works fine for me!

Stay Tuned…

MiPatch, The New Mobile installation Patch

[Updated] The new mobileinstallation patch for iPhone OS 2.2 now available here.

MiPatch (By Hackulo.us) patches the MobileInstallation file in iPhone/iPod Touch in order to bypass genuine check of ipa files! So you can install cracked ipa files using iTunes. An other version of this patch available here.

Installing this package may solve the Installous problem (Not sure)! please test it and report the results here!

[Updated] Read our STEP BY STEP guide for installing apps on your iPhone!

Stay Tuned…img 0052 200x300 MiPatch, The New Mobile installation Patch

iPhone Theme Generator

I found a new site (http://www.iphonethemegenerator.com/) named iPhone Theme Generator!!! It may can create theme for you iPhone (Actually not known!)

IphoneThemeGenerator.com What is it?
iPhone Theme Generator does exactly what the name is telling you, Generate online iPhone themes.

How does it work?
Just choose your wallpaper, dock and statusbar from the library of upload your own bitmaps.Also choose the icons styles you like.

How do I compile my theme?
Easy, just hit the ” Compile Theme ” and grab your theme.

What must I do with the theme files?
Just upload it to the default theme location: var/root/library/summerboard/themes.

How does it work?!!???!!!

Installing ipa on the iPhone, Step by Step Guide

Work on iPhone OS 2.0, 2.0.1, 2.0.2, 2.1, 2.2, 2.2.1

Now you can create your own ipa files. Read more here.

cracked ipa 150x150 Installing ipa on the iPhone, Step by Step GuideYou can find many ways for installing ipa files on the iPhone! Most of them are based on the same method (Not exactly the same!) but have different look! Now the question is “Which way is better for me?” The answer is depend on you and your knowledge about the iPhone OS! So we recommend you to read this guide carefully and choose your favorite way! Note that You can also use a combination of these methods! [New] The Method 3 & 4 of this guide may be interesting for those who wants developing application for the iPhone OS without paying apple! Read this for more information! Another important Question is “Where can I find & download the ipa files?” The answer is the following websites

  • http://appulo.us
  • or search Torrent about ipa files!

Requirements

  • A jailbroken iPhone 2G or 3G (or iPod touch!) running OS 2.x (Up to 2.2.1)
  • Cydia (Automatically installed in jailbreaking process)
  • Internet connection (Faster is better!)
  • A PC or MAC
  • A wireless network (For connecting your iPhone to your PC/Mac)
  • WinSCP (Windows) / CyberDuck (Mac), or any other software that can access to the iPhone trough SSH
  • An iTunes Account

Before you begin

First off all you must download and install at least one application from AppStore (Free or Paid).

  1. Open Cydia, uninstall the Safari Download Plugin if you had previously installed it
  2. Open iTunes
  3. Go to AppStore
  4. Select an application then Click “Get App”
  5. Enter you iTunes account info (User name & Password)
  6. Sync your iPhone with iTuens

Method 0 (Using Installous, stand alone)installous Installing ipa on the iPhone, Step by Step Guide

  1. Open Cydia, add this source: http://cydia.hackulo.us
  2. Still in Cydia, install “Installous ver 2.0″
  3. Quit Cydia
  4. Reboot iPhone
  5. Open Installous
  6. Select browse tab!
  7. Navigate to home Screen by pressing home!
  8. Download the ipa file
  9. Go to Downloads tab
  10. Tap on the ipa file then select INSTALL!

Method 1 REMOVED

Method 2 (Using Installous together with PC/Mac)

installous Installing ipa on the iPhone, Step by Step Guide

  1. Open Cydia
  2. Add this source: http://cydia.hackulo.us
  3. Still in Cydia, install “Installous”
  4. Still in Cydia, install “OpenSSH”
  5. Quit Cydia
  6. Reboot iPhone
  7. Connect iPhone to PC/Mac (Using WiFi)
  8. Connect to the iPhone using SSH connection (WinSCP ,CyberDuck , etc) “Username: root Password: alpine”
  9. Navigate to “/Private/var/mobile/Library/Downloads “
  10. Copy “.ipa” files to this folder
  11. At this time you see a list of applications that previously copied to the “Downloads” folder
  12. Click on the application name then click install.

Method 3 (Using iTunes, Automatic MobileInstallation patch)

  1. Open Cydia
  2. Add this source: http://cydia.hackulo.us or http://iphone.org.hk/apt
  3. Still in Cydia install MiPatch (By Hackulo) or Mobileinstallation (by iPhone.org.hk)
  4. Restart iPhone
  5. Connect iPhone to your PC/Mac by USB-Cable
  6. Copy cracked ipa files into your iTunes Library (just drag and drop to the iTunes Window)
  7. Tell iTunes to install applications that you want
  8. Start Syncing iPhone!

Method 4 (Using iTunes, Manual MobileInstallation patch)

[NOT RECOMMENDED]

  1. Open Cydia
  2. Install “OpenSSH”
  3. Connect iPhone to PC/Mac (Using WiFi)
  4. Connect to the iPhone using SSH connection (WinSCP ,CyberDuck , etc) “Username: root Password: alpine”
  5. Navigate to /private/var/mobile/ folder
  6. Set the permission of the Applications folder to 777 (make sure reclusive is checked).
  7. Stay in the /private/var/mobile/ folder.
  8. Create a folder called “Documents” in the /private/var/mobile/ folder. Make sure to spell “Documents” correctly, with a capital “D”.
  9. Set the permission to 777.
  10. Navigate to the root level and open the /Applications folder.
  11. Create a folder called “Documents” inside the /Applications folder and set permission to 777.
  12. Go to /System/Library/PrivateFrameworks/MobileInstallation.framework
  13. Rename the file “MobileInstallation” to “MobileInstallation.bak”
  14. Download this patched MobileInstallation(For 2.1) file from HERE(2.1). Note that you have to download the patched file for the firmware you are running. ie. if you are running 2.1, you need the MobileInstallation 2.1 patched file.
  15. Place the patched file into the /System/Library/PrivateFrameworks/MobileInstallation.framework folder and set the permissions 775 for the patched MobileInstallation file. If there is some type of extension (ie .dylib), then you need to remove that extension.
  16. Reboot your iPhone/iPod Touch
  17. Drag and drop the .ipa file you downloaded into the iTunes Application library.
  18. Sync your iPhone/iPod Touch and enjoy!

Combining iPhone/Ipod Touch Themes

Some times you find a new theme for iPhone but you want to use only one part of this theme (e.g. LockScreen) or you may want to use combination of diffrent themes!

You can create your theme combination as easy as 1,2,3!

Here are the few instructions to extract only the desired customizations:

  1. Install the complete package from Cydia
  2. Connect to your iPhone via SSH
  3. Go to the package folder /private/var/stash/Themes.8tnMPs/ (e.g. Rabbids.theme) and rename it
  4. Keep only the files you are interested in, according to the following table
  5. Launch Winterboard!
  6. the result of your work will appear under the new name (e.g. My Rabbids Lockscreen).
  7. just select it and exit Winterboard
  8. that’s all! Enjoy new theme!

Lockscreen
Files: \LockBackground.png

Springboard
Folder: \Icons\
Files: \Wallpaper.png
\Dock.png

Dialer
Folder: \Folders\MobilePhone.app\

Notes
Folder: \Folders\MobileNotes.app\

Battery
Files: \Bundles\com.apple.springboard\BatteryBG_*.png

Weather
Folder: \Folders\Weather.app\

SMS Bubbles
Folder: \Bundles\com.apple.MobileSMS\

Slider
Folders: \Bundles\com.apple.springboard\*.lproj\
Files: \Bundles\com.apple.TelephonyUI\bottombarknobgray.png
\Bundles\com.apple.TelephonyUI\bottombarknobgreen.png
\Bundles\com.apple.TelephonyUI\bottombarknobred.png
\Bundles\com.apple.TelephonyUI\bottombarbkgnd.png
\Bundles\com.apple.TelephonyUI\bottombarbkgndlock.png

iPod
Folder: \Folders\MobileMusicPlayer.app\

Safari
Folder: \Folders\MobileSafari.app\

Calculator
Folder: \Bundles\com.apple.calculator\